The DJI Mavic Mini drone is among the very much demanded class of drones. It’s the smallest and lightest Mavic drone ever. The DJI Mavic Mini drone is even among the best drones that cost below $500. It has a strong battery that guarantees a longer flight time and the ability to charge three batteries at once. So, you can always make use of other batteries when one is exhausted. Also, it features a hub that can be used to charge other devices like your phone.
How to charge a DJI Mavic Mini controller is a problem people have to deal with, so in this article, we will provide a solution to it. We will also explain how to charge DJI Mavic Mini Batteries, and we will give answers to some other questions that a large percent of users, including you, probably have in mind.
Having a good Mavic Mini battery that’s fully charged is essential in having an eventful flying experience as it affects the flight time and the maximum altitude that can be reached. Two different methods can be used to charge your DJI Mavic Mini battery. They are explained below.

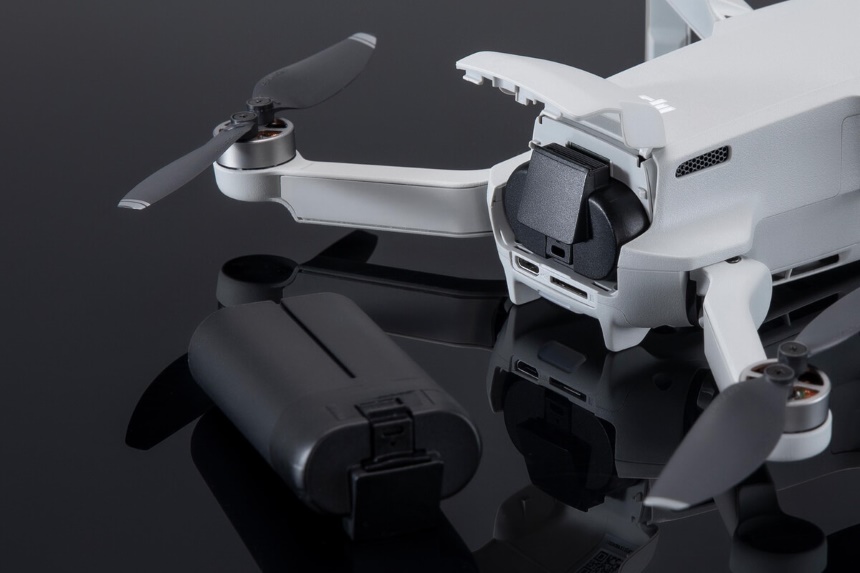
You can charge your Mavic Mini battery by inserting it into the drone. After that, you plug the Micro USB into the back of the drone and plug the other part into a power outlet. The power outlet options are numerous; you can use a wall outlet, power bank, or a computer.
However, you must have a good battery to be able to enjoy the maximum benefit of your drone. According to most drone professionals, the Mavic Mini Intelligent Flight Battery is the best battery available as it allows you to focus on your flying. The battery provides a maximum flight of 30 minutes, which means that you will focus less on power levels. Also, this battery is among the best DJI Mavic Mini Accessories on the market.

The two-way charging hub allows you to charge the batteries by connecting the Micro USB to the side of the hub and connecting a USB-A cable (the bigger rectangular cable-type) to the side of the hub as well.
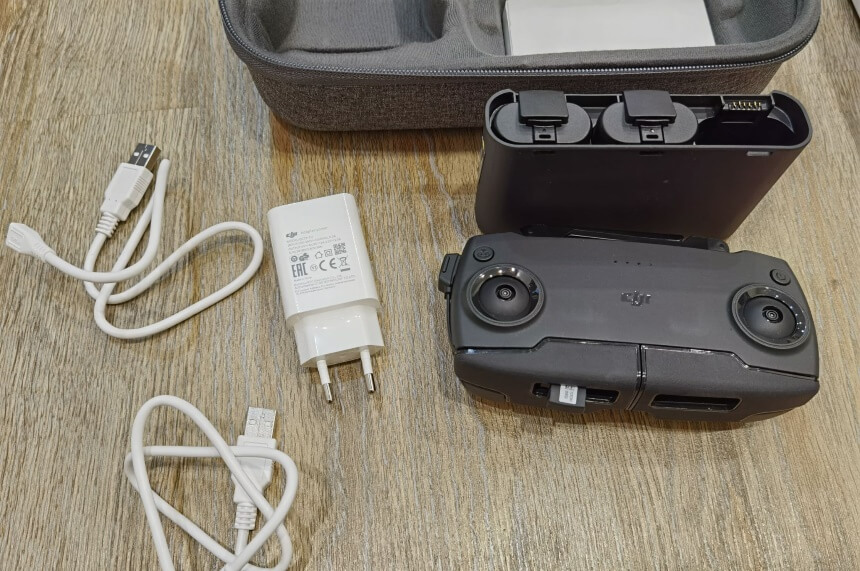
With the two-way charging hub, you can charge three Mavic Mini batteries at a time. That means you don’t have to bother about flight time because you have two extra batteries to use. There are several two-way charging hub options on the market, but experts have singled out the DJI Mavic Mini Two-Way Charging Hub as the best and most reliable. It holds the three batteries and charges all of them in sequence, i.e., after one battery is fully charged, another will follow. That means you won’t be tasked with switching them.
With the regular Mavic Mini kit, you can charge your battery by simply inserting your drone into it. After you’ve inserted your drone, plug your Micro USB cable into the kit as well as to a power source, then your Mavic Mini battery begins to charge. The downside of the regular Mavic Mini kit is that you can only charge a battery at a time. This brings us to the other kit option available – Mavic Mini Fly More Combo.
The Mavic Mini Fly More Combo includes a two-way charging hub, which means that you can charge as many as three batteries at a time. You will conveniently charge the three batteries without having to switch to another after one is fully charged.
Following the judgment of most reviewers, the DJI Mavic Mini Combo is the best kit you can use for eventful drone-flying experiences. It weighs less than 250 grams, thereby permitting you to avoid registration with the Federal Aviation Administration (FAA) Trusted Source Federal Aviation Administration The Federal Aviation Administration is an operating mode of the U.S. Department of Transportation. www.faa.gov and escape the stringent rules of the Federal Aviation Regulations (FAR) Trusted Source Federal Aviation Regulations Federal Aviation Regulations (FAR’s) are mandates for controlling all aspects of aviation in the United States. www.aviation-safety-bureau.com .
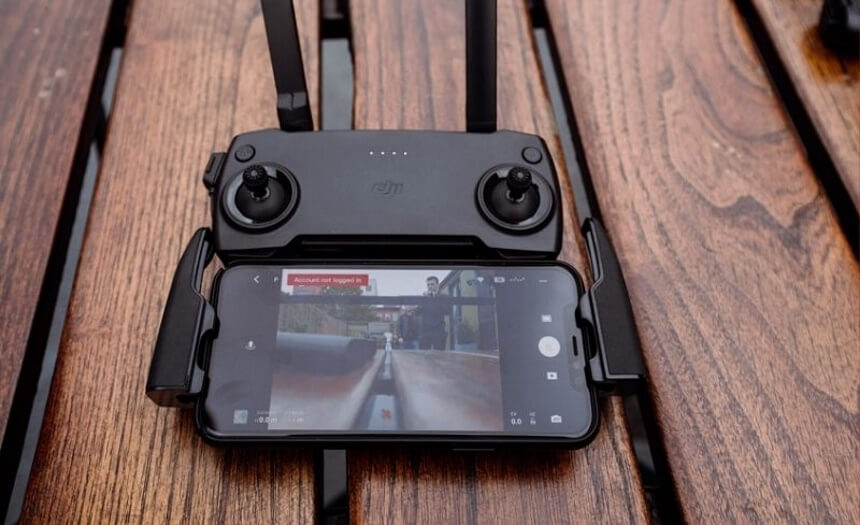
This is where most users, if not all, have issues. How to charge a DJI Mavic Mini controller is one of the most frequent searches on the internet as the manufacturers didn’t do due diligence in explaining how this is done. The Mavic Mini Controller has no USB port like the drone and the two-way charging hub, so how are you supposed to charge it? DJI said you should use the Micro USB cable, but since the controller doesn’t have a USB port, where will you connect it to? We will explain that now!
Well, DJI somehow gave the right instruction even if they failed to explain in detail. For it to work, you won’t be connecting your Micro USB cable to a USB port. Rather, you will be connecting it to the USB OTG port on the controller.
The USB OTG port is rectangular, while the Micro USB cable is not rectangular. So to connect both of them together, you will have to fix the longer end of the Micro USB cable to the back of the controller. If you make this connection in a way other than this, you could spoil the Micro USB cable.
When the controller and your android phone are connected, the controller begins to charge the phone automatically. This is related to the communication protocol and the android system. It’s been regulated by the Android Open Accessory (AOA). Because of this, your controller’s battery gets drained quickly, and sometimes your phone even gets hot.
However, this doesn’t happen with an iPhone. When an iPhone is connected to the controller, it won’t charge. But do you really have to buy an iPhone just because you want to fly a drone?

Connecting your phone to your drone is relatively easy.
Well, the good news is that you can connect your android phone to your controller without draining the controller of its battery. But you will have to do some configurations to have this done. Firstly, you will have to get your phone rooted Trusted Source How to Root Android Smartphones and Tablets (and Unroot Them) | Digital Trends Android rooting is the ideal way to get more control over your smartphone, opening up a world of unknown possibilities, but it’s important to approach it with caution. Rooting isn’t without its risks — and if something goes wrong, it can void your warranty, leave you with a broken smartphone or tablet, or worse. www.digitaltrends.com . Then you follow this step-by-step process.
After this, the controller will stop charging your phone. If you want to reverse this action, open the Disable Battery Charging App and click on “Enable Battery Charging.”
Turning off the controller is pretty easy. All you have to do is to long-press the power button until the indicator light goes off.
Turning on the controller is pretty easy as well. Long-press the power button until the indicator light is on. That’s all! If you want to check the current battery level, just press the power button once, and it will be displayed. You don’t need to long-press the power button this time around.
For you to fully charge your DJI Mavic Mini Controller, you will have to leave it plugged into a power source for appropriately 2 hours.
Yes, you must charge your DJI Mavic Mini Controller. As you use the controller, the battery life reduces, which necessitates that you must charge it for continuous use.
The controller, when connected to an IOS device, can last as much as 4 and a half hours. When it’s connected to an android device, it can last for about 1 hour 40 minutes.
Yes, DJI drones can be used for virtual reality. In fact, their drones are among the highly rated virtual reality drones on the market. They can be easily controlled, and they have stabilized cameras.
DJI Mavic Mini is one of the best drones you can find on the market. It comes with three batteries that can be charged at the same time, thereby ensuring that your flight time doesn’t get shortened because of a low battery. Each of these batteries can last for as long as 30 minutes, so you don’t have to worry about the battery life left. All you have to do is to focus on capturing quality photos and videos. How to charge a DJI Mavic Mini Controller is a common problem people encounter, but we’ve dealt with that in this article. By now, you should be able to charge your DJI Mavic Mini Controller easily.